CSCI 241 Labs: Lab 10
Using and Defining Objects
There are 5 checkpoints  ,
including the
clean-up checkpoint, in this lab.
Work together with your partner using one
of your accounts.
CHANGE WHO CONTROLS THE COMPUTER AFTER EACH CHECKPOINT!
If you need help with any exercise, raise your hand.
,
including the
clean-up checkpoint, in this lab.
Work together with your partner using one
of your accounts.
CHANGE WHO CONTROLS THE COMPUTER AFTER EACH CHECKPOINT!
If you need help with any exercise, raise your hand.
Copy the Lab10 directory from
the course directory.
If you have forgotten how, refer to the handouts for labs 1 or 2.
Everything you need for the
lab exercises today is contained in this directory (except your
outstanding intellect).
Change directories into Lab10
and start running BlueJ.
Using Objects in Interactive
Method Calls
Open the PictureDemo project.
The classes in this project are a simplified version of some of the
classes in the acm.graphics
library.
They may be used to create images. They also contain one "extra"
method, move().
You are free to use move()
in this part of the lab, but it will not be available for the next
checkpoint.
To work with this project,
remember the coordinate system used by Java. Java places (0,0) in the
upper left
corner of the window. The x values get larger as you move to the right.
The y values get larger as you move down. The units are in terms of
"pixels", or dots on the screen. With our lab's screen resolution, 100
pixels is about 1.25 inches.
- Compile the project by
clicking on the Compile
button.
- Right click on the GraphicsProgram
class and choose new
GraphicsProgram(). BlueJ will
prompt you for an object name, giving you the default name graphics1.
Replace this with the name picture
and then click on the "OK" button. A window should appear on the screen
and an object icon should appear in BlueJ's object bench. We will add
objects to the window to create a drawing.
- Right click on the GRect
class and choose new
GRect(double x, double y, double width, double height).
When asked for a name, type wall
as the new GRect
object's name. Supply the parameters 100, 200, 200, 200, in that order.
wall
now appears on BlueJ's object bench. Note that wall
has been instantiated, but is not yet displayed.
- Right click on picture
and choose the add()
method. In the window that appears, enter wall
as the object to be added. The graphics window should now contain a
square at the location (100,200) with a side length of 200 pixels. that
will make it appear. Note that the square is currently a simple line
drawing.
- We want to make the wall
red. This requires two steps:
- Right click on wall
on the object bench and choose the method the setFillColor().
Enter as its parameter java.awt.Color.RED
(remember to use the specified capitalization).
- Right click on wall
again and choose the method setFilled().
Enter as its argument true.
STOP!!!
MAKE SURE YOU FOLLOW THE NEXT STEP VERY
CAREFULLY!!!
- Now you are on your own. The
goal is to create a simple image of a house with a sun in the sky. For
the next checkpoint, we want
to see a written list of the exact steps you used to create the image.
Take out a clean sheet of paper and make three columns. Here is a
model, with its first line filled in:
| Object |
Method |
Arguments |
|
| wall |
GRect Constructor |
100, 200, 200, 200 |
| |
|
|
| |
|
|
| |
|
|
Write down exactly what
you do at each step. Include:
- Which object did you
manipulate?
- Which method did you
call?
- What argument(s) (if
any) did you pass to the method?
You must have the list to
be checked off at the next
checkpoint.
NOTE:
You can "erase" things you place in the drawing window. If you don't
want to
use an object that you placed in the picture:
- Right-click
on the picture
object on the Object Bench and choose the remove()
method.
- Type
the name of your object as the method argument.
- You
can now delete the object from the Object Bench.
It's okay if you have a
misplaced line or two in the drawing you show us at the checkpoint.
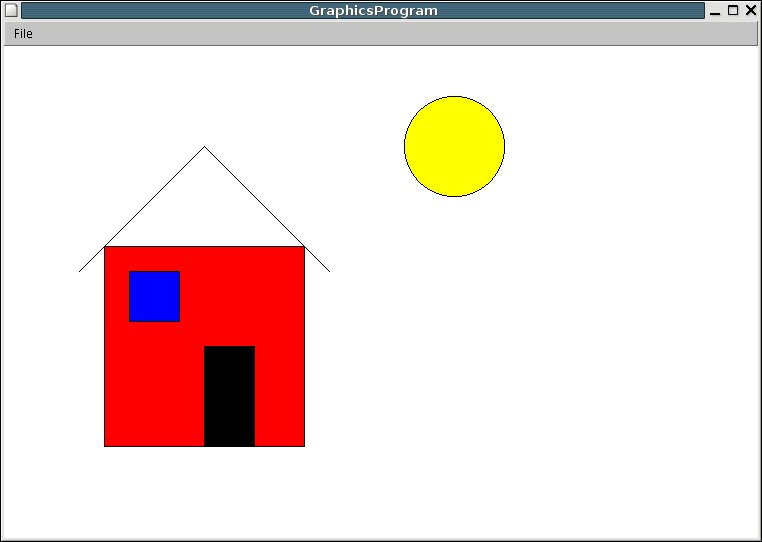
A sample of what the scene
might look like is shown below, but do not feel bound by your
instructor's efforts. Create your own scene.
 1
Show us your scene and written list of method calls.
1
Show us your scene and written list of method calls.
Program Method Calls
Now you'll recreate the same image by writing your steps in a Java
program.
- Close the PictureDemo
project and open the PictureProgram
project.
- Compile the Picture
class.
- Right-click on the Picture
class and run its main()
method. The program runs and places a red wall in the figure.
Unfortunately, that is all it does. There is no door, window, roof or
sun - yet! Your mission, should you decide to accept it, is to finish
the drawing.
- Open the Picture
class in the editor window.
- Look at the code in the main()
method. It begins with two lines that create the window. The wall is
then added to the picture. It is declared
in the line that says:
GRect wall;
It is then instantiated
on the line that says:
wall = new GRect(100, 200,
200, 200);
Finally, several method calls are made. Notice that within this
program, we are able to specify color with simply the capitalized color
name. Check online documentation for the java.awt.Color
class to discover all allowed colors.
- Modify this code. Use the
same method calls you used when making the interactive picture to
create the same picture from within the main program.
Hints:
- Follow the code that is
already there. Method calls always look like:
object.method(arguments);
- Try compiling and
running your code frequently. It is better to catch your errors early
than to be overwhelmed after typing many lines.
- To run this program, DO
NOT construct a picture object. Run the main()
method in the Picture
class.
- Don't hesitate to refer
back to the ACM graphics documentation in Firefox.
2
Show us the image you created.
Adding Methods to the Point
Class
Close the PictureProgram
project.
Open the PointIn2D
project.
Review the Pointless
class in the editor window.
As you can see, this class's main()
method reads in two (x,y) pairs and
finds and prints the distance between them.
Our goal for the rest of this
lab is to create a program that produces the
same results as this main()
method in a different way:
by using an instantiable class that represents points.
We will (hopefully) see the benefits of using classes and methods when
we see a final
program that is shorter and more elegant than that one.
This project contains three
other classes (2 unfinished):
- The Point
class contains data and methods to represent 2D points. This class is
described in the prelab reading.
- The Pointedly
class contains a program that uses the Point
class to produce the same output as the Pointless
program.
- The Triangle
class contains a program to find the perimeter of a triangle.
We will begin by working with the Point
class.
Open it in the editor.
The Point
class is designed to contain data and methods frequently
needed by programs using points (like the Pointless
program).
Now comes the fun part. :^)
We want to add new methods to the class.
Constructor
The default
(i.e., no parameter) constructor is already in the class.
It sets both the x-coordinate and y-coordinate instance variables to
zero.
Write a second constructor
which takes 2 parameters, the first holding the value
to be saved in xCoord
and the second holding the value to be saved in yCoord.
Accessor
The getX()
method is called an accessor.
Its purpose is to allow a programmer to find out a value held privately
within the data stored in the object.
Our point class does not have a getY()
method, but the class contains comments
indicating where the code for this method belongs.
Write getY().
Mutator
The setX()
method is called a mutator.
Its purpose is to allow a programmer to change a value held privately
within the data stored in the object.
Our point class does not have a setY()
method, but the class contains comments
indicating where the code for this method belongs.
Write setY().
The readFromKeyBoard()
method
This method appears in the class as a stub. A method written as a stub
will compile,
but doesn't do anything useful.
One of the operations that we will repeatedly want to do with points is
enter them from
the keyboard. This method should create and use a Scanner object to
read in the values of
xCoord
and yCoord
respectively. Refer back to the similar code found in the Pointless
class, if needed.
Hint:
Remember that in BlueJ, you can copy code from one class and paste it
into another.
The distanceTo(double
px, double py) method
The distanceTo()
method needs to take two double
parameters, named px
and py,
and returns our point's distance
to that point. The code is similar to (but not identical to) the distanceToOrigin()
method.
You and your partner should now write this method from scratch.
Test each of the five methods
you have just written by creating objects of type Point
and calling the methods.
When you are satisfied that the methods are running correctly, call us
over.
3
Be prepared to answer the following questions:
- Will there be any difference
between a Point
created by the default constructor, and one that is created by passing
2 zeroes as arguments to your new constructor?
- Why can't other classes
access the values of xCoord
and yCoord
directly?
- How many different tests did
you run for the distanceTo(double
pX, double pY) method?
- Did you test for two
points separated vertically?
- horizontally?
- with negative, positive,
and 0 values for x and y?
- Experts
Question: Our distanceTo
method takes two doubles
as parameters. Should it be possible to have a distanceTo
method that takes a Point
as a parameter?
Close the Point
class.
Writing Client Code
One of the primary reasons we write classes is so that we can use
objects created from
them in client programs. For this checkpoint you will look at two
different clients
that use the Point
class.
Open the Pointedly
class.
It contains a complete program that should run identically to the Pointless
program. Look over the code, then try compiling and running it.
Does it run correctly? If not, make changes in the Point
class, not in Pointedly!!
Is this program shorter and more elegant than the Pointless
program?
Hint:
The correct answer is yes. Be prepared to tell your instructor or lab
assistant why.
Close the Pointedly
class.
Open the Triangle
class.
It contains a shell for a main program that declares three points and
reads the first
one from data supplied by the user.
Complete the main program so that it reads in all three points from
the user, calculates the perimeter of the triangle they represent and
neatly outputs the
three points and the perimeter to standard output.
Hint:
You can see how we have code that calls the
readFromKeyboard()
method. Use similar code and call the distanceTo()
method. Do NOT
retype or copy the distance formula into this class.
Compile and run the program.
4
Be prepared to answer the following questions:
- Why do we need to place objectName.
in front of the calls to run getX()
and getY()?
- Will your program give a
correct solution if the triangle is degenerate? (A degenerate triangle
might have three colinear vertices, or two vertices that have the same
x and y values.)
Extras for Experts
There is no check point or credit associated with this section. It is
optional.
It is meant to give some challenging exercises to those who finish
early.
There are at least four other
methods that could be added to the Point
class.
The two simplest ones
are setX(double xArg)
and setY(double yArg).
These can be used to change the x and y values of Points.
Implement the setters.
Points can also be represented
in polar coordinates, (r, theta).
r
is the distance to the Origin. theta
is the angle from the X axis
to the ray from the Origin to the Point
measured in a counter clockwise direction. theta
= arcCos (x/r) assuming that y
is positive.
Implement getR()
and getTheta()
for the Point
class.
Do not add r and theta to the class as data members. Translate from x
and y to r and theta in the methods.
Here is an even more
interesting project. Most likely, your Triangle
class contains a main()
method that in turn contains three Points
and code to calculate the perimeter. Move the declarations for the
three
Points
above the main
method so that they are now instance
variables in the class.
Add a constructor to instantiate the three Point
objects, and a method to calculate the perimeter. Rewrite the main
program so that it declares a Triangle
object and then calculates the perimeter.
After the Lab
Your next programming assignment will be posted soon.
Remember to log out from Canvas (if you are still logged on) and close
Firefox before you log out.
5
Show us that you have logged out, cleaned up, turned off your monitor
and
pushed in your chairs for this last checkpoint.